
How to Tie a Four-in-Hand Knot Step by Step

Table of Contents
- Preparation: Getting Your Tie and Collar Ready
- How to Tie a Four-in-Hand Knot Step by Step
- Adjusting the Knot for Fit and Final Tie Length
- How to Tie a Tie with a Dimple
- Four-in-Hand vs Windsor Knot: Which Should You Wear?
- Troubleshooting: Knot Symmetry, Fabric Types and Common Mistakes
- Best Mens Formal Accessories NZ: Completing the Look
- Frequently Asked Questions
Last Updated: September 14, 2026
Preparation: Getting Your Tie and Collar Ready
The four-in-hand knot is the most widely worn necktie knot in the world, and for good reason: it produces a slim, slightly asymmetrical shape that suits almost every collar and face shape. Before you tie anything, though, a few seconds of preparation will save you a crooked result later.
Start with your shirt buttoned to the top and the collar standing up. Drape the tie around your neck with the wide end on your dominant-hand side and the narrow end on the other. The wide end, sometimes called the tie blade, should hang roughly 30 centimetres lower than the narrow end, since it does most of the travelling during the knot. A common mistake is starting with both ends level, which leaves you short of length by the final tighten. Check that the tie's lining faces inward and the fabric sits flat against your shirt placket before you begin.
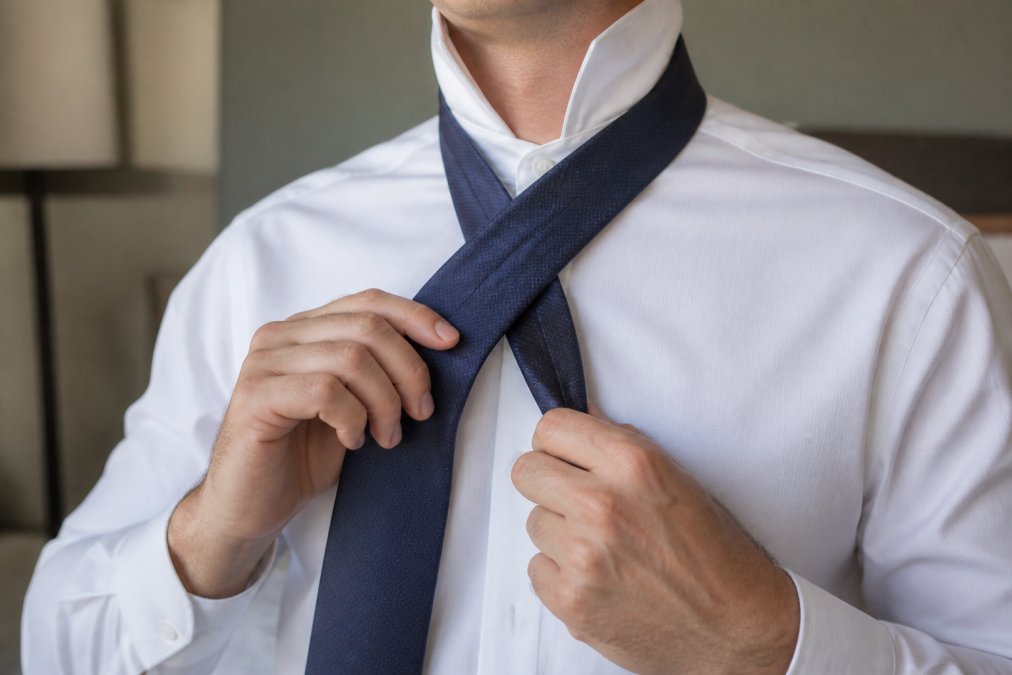
How to tie a necktie, including the four-in-hand
How to Tie a Four-in-Hand Knot Step by Step
Follow these steps in order, keeping light tension on the tie throughout. The whole process takes under a minute once you've practised it a few times. The key is to let the knot form naturally rather than forcing it, the four-in-hand is forgiving because it only crosses once at the front, which is why it works on almost any fabric weight.
- Cross the wide end over the narrow end, forming an X just below your collar. Keep the crossing point high, close to the collar, so the finished knot sits neatly.
- Bring the wide end underneath the narrow end and back up toward your collar. This is the only point where the wide end travels behind the narrow end.
- Cross the wide end back over the front of the narrow end, so it now points downward again. You should see a loose loop forming around your finger.
- Pass the wide end up through the loop between your collar and the knot. Feed it from underneath, keeping the fabric flat rather than twisted.
- Thread the wide end down through the front loop you've just created. This is the step that locks the knot's shape.
- Pull the wide end gently to tighten, then slide the knot up toward your collar. Tighten by pulling the wide end down and the knot up simultaneously, not by yanking the narrow end.
- Adjust the narrow end and smooth the knot into shape. The finished knot should sit centred, with the wide end hanging straight.
Mirror-Image Instructions for Left-Handed Tyers
Left-handed tyers should simply reverse the starting position: hold the wide end in your left hand and the narrow end in your right, then mirror each crossing. The knot itself is identical; only the direction of travel changes. If you're struggling, stand in front of a mirror and follow your reflection rather than your hands, which most left-handers find quicker to learn.
How Fabric Type Changes the Knot
Most guides treat every tie the same, but the fabric you're working with changes how the knot behaves. Silk ties are smooth and slippery, so they need a firmer final pull and tend to produce a smaller, tighter knot, you may need to re-tighten once or twice during the day. Wool and thicker woven ties have more natural grip, so they hold their shape well but can bulk up if you tighten too aggressively; keep the knot slightly looser to avoid a compressed, lumpy look. Knit ties are the outlier: their open weave and lack of a stiff lining mean the four-in-hand can look floppy, so many wearers prefer a tighter knot or a different knot entirely. If you're unsure, tie the knot loosely first, check the shape in a mirror, then adjust tension before the final tighten.
Adjusting the Knot for Fit and Final Tie Length
Once the knot is formed, slide it upward rather than pulling the wide end downward, which stretches the fabric and distorts the shape. The finished tie should sit snug against your collar with the tip landing at your midriff, ideally near your belly-button or the top of your belt. Length adjustment happens before you tighten fully: if the tie is too short, loosen the knot and re-drape with more length on the wide end. A well-tied four-in-hand knot should feel secure but never tight enough to restrict breathing.
How to Tie a Tie with a Dimple
A dimple is the small crease just below the knot that gives a tie a polished, professional finish. To create one, pinch the fabric directly below the knot with your thumb and forefinger as you make the final tighten, then hold the pinch while you slide the knot up. The dimple forms naturally if you keep the tie's fabric texture centred rather than flat. Silk ties dimple easily; thicker woven ties need a firmer pinch to hold the crease.
Four-in-Hand vs Windsor Knot: Which Should You Wear?
The four-in-hand knot produces a narrow, slightly asymmetrical shape, while the Windsor knot is wider, more symmetrical, and uses more fabric. Choose the four-in-hand for standard and narrow collar points, and the Windsor for spread or cutaway collars that need more knot volume to fill the space. For most business attire and formal wear, the four-in-hand works better because it suits a wider range of shirt styles and doesn't overwhelm a slimmer lapel.
| Knot | Shape | Best Collar Type | Fabric Use | Formality |
|---|---|---|---|---|
| Four-in-hand | Narrow, asymmetrical | Standard, narrow | Less | Business to formal |
| Windsor | Wide, symmetrical | Spread, cutaway | More | Formal to black-tie |
Troubleshooting: Knot Symmetry, Fabric Types and Common Mistakes
Knot symmetry problems usually trace back to uneven tension rather than the knot itself. If your four-in-hand knot leans to one side, loosen it completely and re-tie, keeping equal pressure on both ends as you tighten. A common pattern is that the knot leans toward whichever hand is doing the pulling, if you're right-handed, you may unconsciously pull the wide end harder, which drags the knot left. Consciously alternate which hand tightens to keep it centred.
Fabric type changes how the knot behaves, and most guides ignore this entirely. Silk ties slip more than woven fabrics, so a firmer final pull helps them hold their shape, but over-tightening can leave a permanent crease along the fold line. Wool and thicker woven ties need a looser knot to avoid bulk, and they tend to hold a dimple more easily because the fabric has more body. Knit ties are the trickiest: their open weave and lack of lining mean the knot can look shapeless, so keep the tension firm and consider a smaller knot style if the four-in-hand looks too loose.
Other common mistakes include starting with the wrong end length, forgetting to button the top collar button first, and rushing the final tighten, which flattens the dimple. A less obvious one is tying the knot while the tie is still twisted from storage; always let the tie hang free for a minute before you start so the fabric relaxes.

Knot Maintenance: Protecting Your Tie
A four-in-hand knot left tied for days will develop a permanent crease and can distort the tie's lining, especially on silk. Untie the knot every time you remove the tie, and store it rolled or hung flat rather than folded. If your tie has a keeper loop, use it, it prevents the narrow end from swinging forward and reduces wear on the fabric. Allow the tie to air out before storing it after a long day.
Local Dress Code Context
In New Zealand, the four-in-hand is the default knot for most formal and business occasions, school balls, weddings, job interviews, and corporate environments. It's also the knot most commonly taught in school uniform guidelines, which is why so many people learn it first. For business-casual settings, a four-in-hand in a textured or knit tie reads as relaxed but considered; for formal events, a silk tie in a solid or subtle pattern with a four-in-hand is the safest choice. If you're unsure what's expected, the four-in-hand is almost never wrong, it's the most versatile knot for the widest range of NZ dress codes.
Best Mens Formal Accessories NZ: Completing the Look
A sharp knot is only part of the picture. Coordinating your tie with a pocket square and cufflinks lifts the whole outfit, and matching sets take the guesswork out of it. SimonVon Shop stocks coordinated tie, pocket square, and cufflink sets from $34.50, including the Red Silk Tie Pocket Square Cufflinks Set and the Gold Paisley Tie Pocket Square Cufflinks Set. For a subtler look, the Men's Tie Yellow Green Striped Tie Pocket Square Cufflinks Set pairs a striped tie with a matching hanky for a coordinated finish.


Frequently Asked Questions
How long should my tie be after tying a four-in-hand knot?
The tip of the tie blade should land at your midriff, around the belly-button or just above your belt buckle. If it finishes too short, start with the wide end lower before you begin the first cross over. If it hangs past your belt, start with the wide end higher. Because the four-in-hand knot uses less length than bulkier knots, you have more room to fine-tune the drape before tightening.
How do you tie a four-in-hand knot with a perfect dimple?
Before you tighten the knot fully, pinch a small fold into the fabric just below the knot with your thumb and forefinger. Hold that fold in place while you slide the knot up toward the collar. The dimple sits best in silk and silk-blend ties with a bit of lining, and it holds its shape better once the knot is snug. Practise on a mid-weight tie first, as very stiff fabrics resist the fold.
Is the four-in-hand knot suitable for formal events like school balls?
Yes. The four-in-hand is the most versatile necktie knot and works well for school balls, weddings and business attire. Its slightly asymmetrical, narrow shape suits spread and semi-spread collars, and it pairs naturally with slim or standard-width ties. If you want a larger, more symmetrical knot for a wide collar, a Windsor knot may suit better, but the four-in-hand remains a safe choice for almost any formal occasion.
How does the four-in-hand knot differ from the Windsor knot?
The four-in-hand is narrower, slightly asymmetrical and uses less fabric, making it ideal for standard and slim ties and most collar types. The Windsor is wider, fully symmetrical and needs more length, so it suits wide-spread collars and heavier fabrics. The four-in-hand also creates a smaller slip knot, which some wearers find easier to adjust. For everyday business wear and slim ties, the four-in-hand is usually the better match.
Tying a four-in-hand knot well comes down to preparation, even tension, and a little patience with the dimple. SimonVon Shop makes the rest easy, with coordinated tie, pocket square, and cufflink sets priced for weddings, school balls, and everyday business wear. Browse the full range and get your formal look sorted in one order.